

How to Create a Timeline in PowerPoint?
10 min read
12 May 2025
By Aijaz Mughal
Ever sat through a dull presentation packed with bullet points, wondering when it would end, and felt your attention wander?
You’re not alone!
Most audiences lose interest within minutes when the slides are cluttered, text-heavy, and hard to follow. If you’re tired of seeing your message get lost in the noise, it’s time to rethink how you present your ideas.
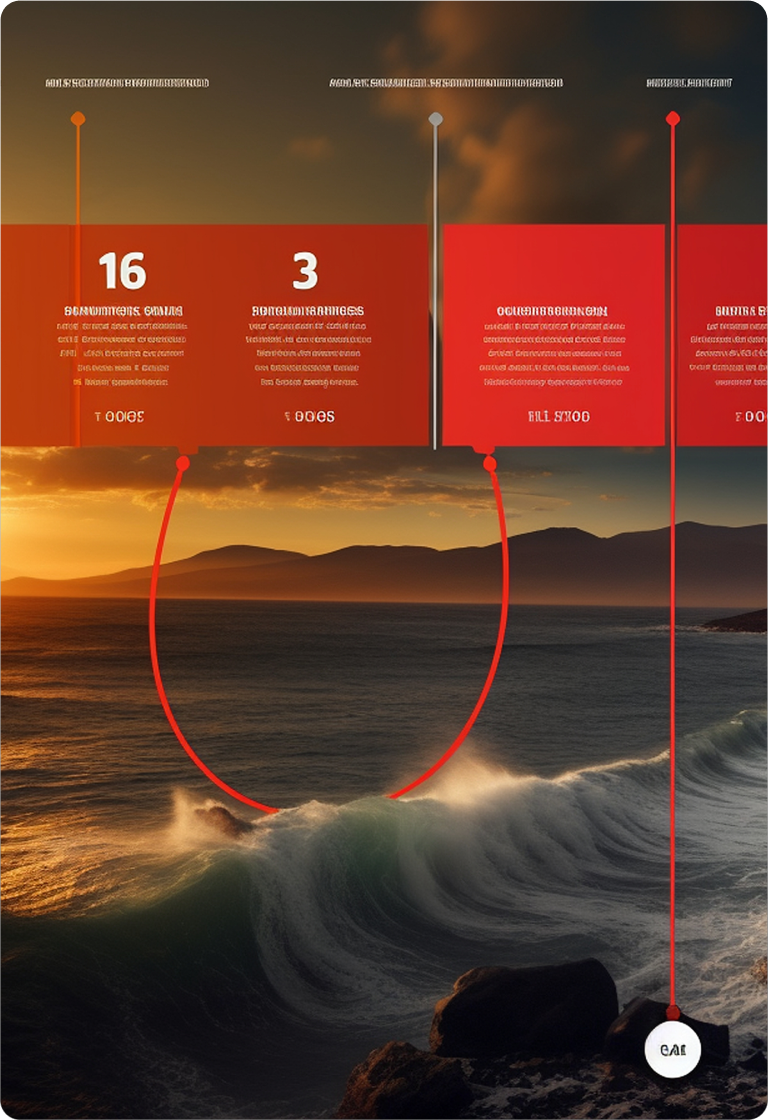
One powerful way to do that? Learn how to create a timeline in PowerPoint. A timeline isn’t just a graphic, it’s a visual story. It shows progress, highlights milestones, and makes complex details easier to understand.
By the end of this guide, you’ll not only understand how to create a timeline in PowerPoint but also how to make it visually appealing and impactful.
In this guide, we’ll walk you through everything you need to create a timeline in PowerPoint that’s not only easy to build but also visually appealing and impactful.
Preparing Your Content: What to Do Before Creating a Timeline
Before you jump into PowerPoint, take a few minutes to plan your timeline. A little preparation goes a long way in making your timeline clear and organized.
Here’s what to do:
- List the key events you want to include on your timeline.
- Write short descriptions and note down the dates for each milestone.
- Decide whether your timeline will cover days, months, years, or decades.
- Choose between a horizontal or vertical layout based on your content and slide space.
Planning ahead like this helps you stay focused and makes the timeline much easier to build once you’re in PowerPoint.
Step-by-Step: How to Create a Timeline in PowerPoint
PowerPoint has built-in tools that let you create timelines without needing advanced design skills. If you’re short on time or just want something that looks clean and structured, SmartArt is your best friend.
Here’s a complete breakdown of how to create a timeline in PowerPoint, step by step:
Step 1: Open a New Slide
Start by launching PowerPoint and opening the presentation you want to work on. Navigate to the section where you’d like to insert your timeline. If it’s a new presentation, you can begin on the first slide.
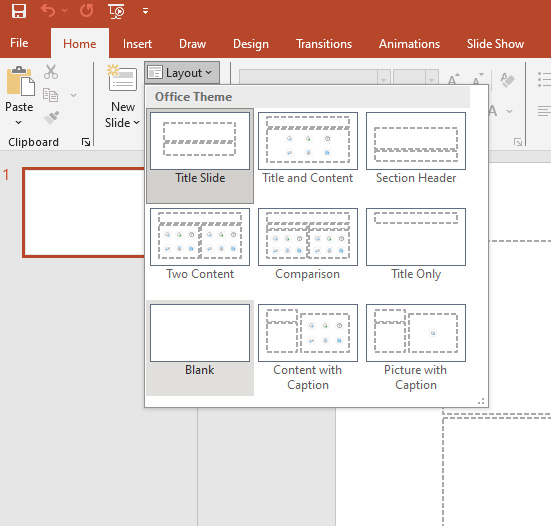
For best results, use a blank slide layout to avoid visual clutter:
- Click on Home in the top ribbon.
- Select Layout, then choose Blank.
Using a blank canvas helps your timeline stand out clearly without competing with titles or bullet points.
Step 2: Insert SmartArt
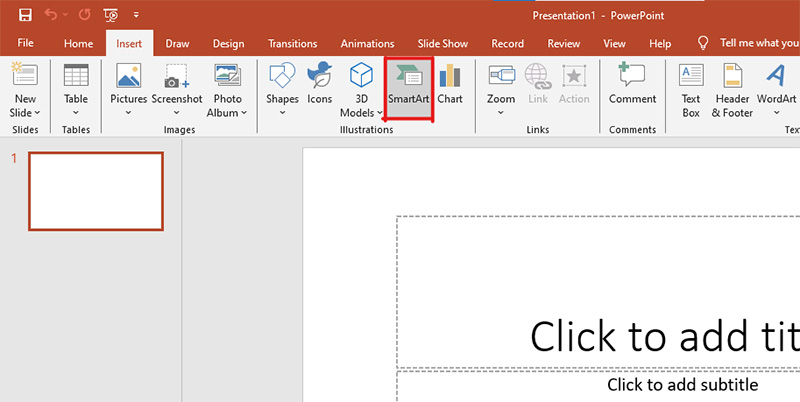
Next, head to PowerPoint’s built-in graphic tools:
- Click on the Insert tab in the top menu.
- In the “Illustrations” group, select SmartArt.
This opens a gallery of different visual formats, specifically designed to help you present data in a structured and engaging way.
Step 3: Choose a Timeline Graphic
Once the SmartArt gallery appears, choose a layout that suits your needs.
- In the left sidebar, click on the Process category.
- Browse through the options and look for timeline-friendly layouts such as:
- Basic Timeline – A clean, horizontal line is ideal for showcasing sequential events.
- Circle Accent Timeline – A more creative option that uses circular nodes.
- Alternating Flow or Upward Arrow – Great for visual storytelling with movement.
Click OK after selecting your preferred layout. It will instantly appear on your slide, ready for editing.
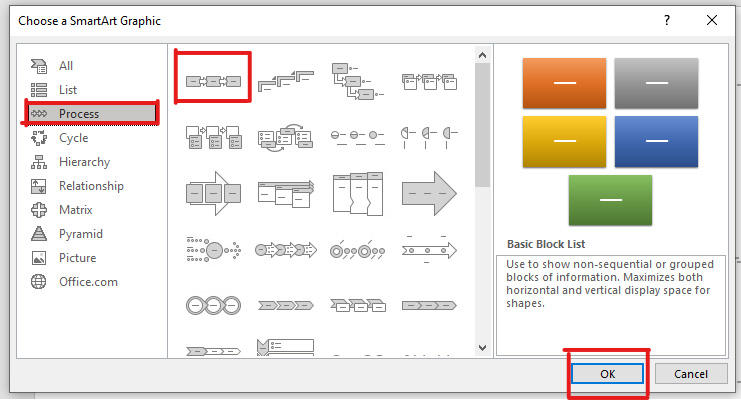
Tip: Start simple. You can always customize the look later to match your presentation style.
Step 4: Add Timeline Events and Dates
Once your SmartArt graphic is inserted, it’s time to enter your actual content.
You can type directly into the boxes on the timeline, or use the text pane:
- To open the text pane, click the small arrow on the left edge of the SmartArt graphic.
- In the pane, enter each milestone in order, typically in this format:
Event Title (e.g., “Launch Phase”) + Date (e.g., “Jan 2024”).
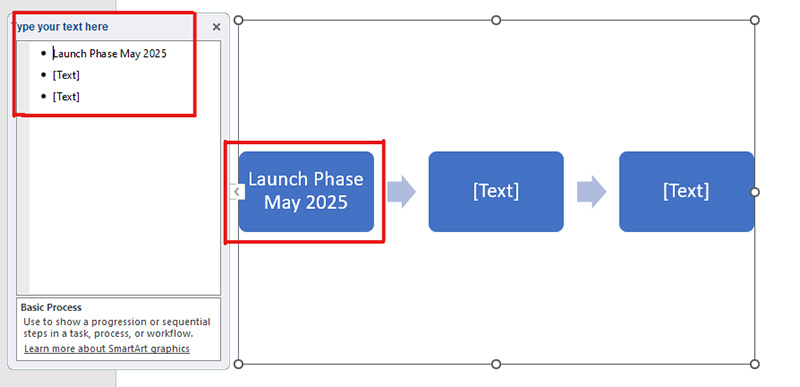
Each line you add becomes a new milestone on your timeline. PowerPoint will automatically format and space the items based on the layout you’ve chosen.
Step 5: Customize the Design
Now that your content is in place, personalize the visual style to match your branding or presentation theme.
- With the timeline selected, click on the SmartArt Design tab.
- Choose Change Colors to switch up the color scheme.
- Use SmartArt Styles to add effects like shadows, bevels, or 3D styles.
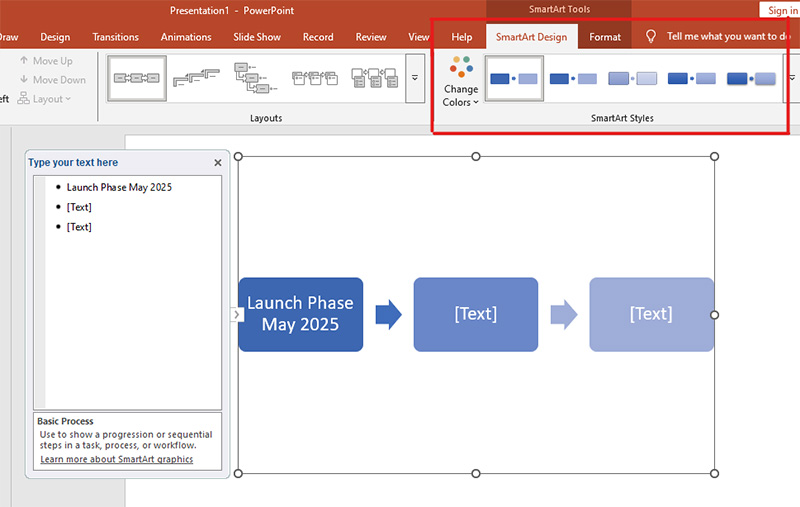
Tip: Stick to 2-3 colors max to keep the slide looking clean. Use consistent fonts and colors throughout your presentation to maintain a professional tone.
You can also resize the entire SmartArt box or adjust the spacing between elements for better alignment.
Step 6: Add or Remove Timeline Events
Need to add more steps or milestones to your timeline? No problem:
- Click on your SmartArt graphic.
- Go to SmartArt Design > Add Shape.
- Choose where you want to insert the new item:
- Add Shape After – Adds a new event to the right or bottom.
- Add Shape Before – Adds a new event to the left or top.
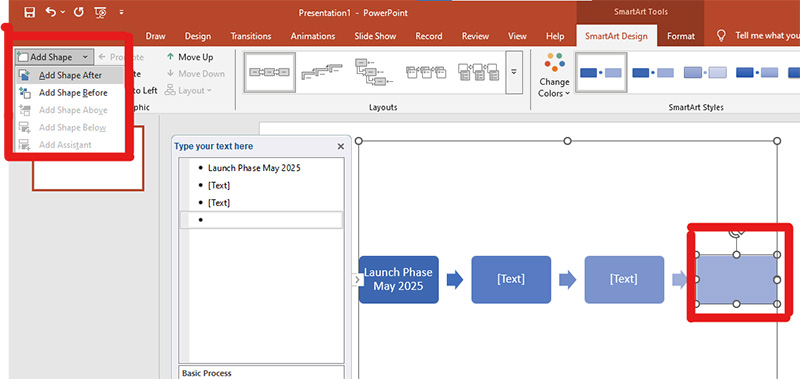
To remove an event:
- Click on the specific shape you want to delete.
- Press the Delete key on your keyboard.
PowerPoint will automatically adjust the layout after each addition or deletion to keep things neat.
Step 7: Adjust Layout and Final Positioning
Before you move on, take a moment to check the layout of your timeline:
- Use your mouse to drag and reposition the graphic on the slide.
- Resize by clicking and dragging from the corners to make sure it fits well within your slide margins.
- Ensure there’s enough spacing around the timeline so it doesn’t feel cramped or lopsided.
If your timeline starts looking too crowded, consider spreading it across two slides or simplifying the number of events.
By following these steps, you can effectively create a timeline in PowerPoint that is both informative and visually engaging.
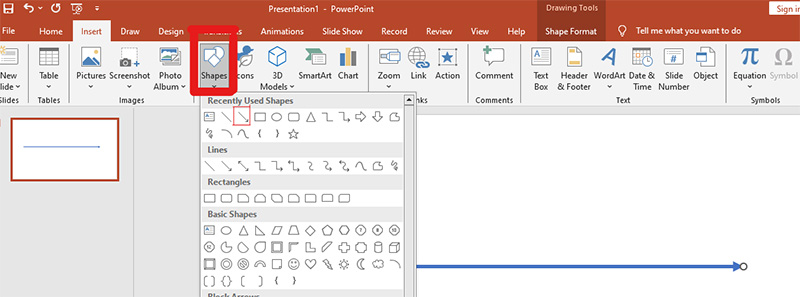
Alternative Method: Manually Create a Timeline Using Shapes
If you want more control over your design, you can create a timeline manually using basic shapes in PowerPoint. This method gives you full flexibility to style and position each element exactly how you want.
Here’s how to do it:
Draw the timeline line
- Go to Insert > Shapes, then choose a line or arrow.
- Draw a horizontal or vertical line across your slide to represent the flow of time.
Add milestone markers
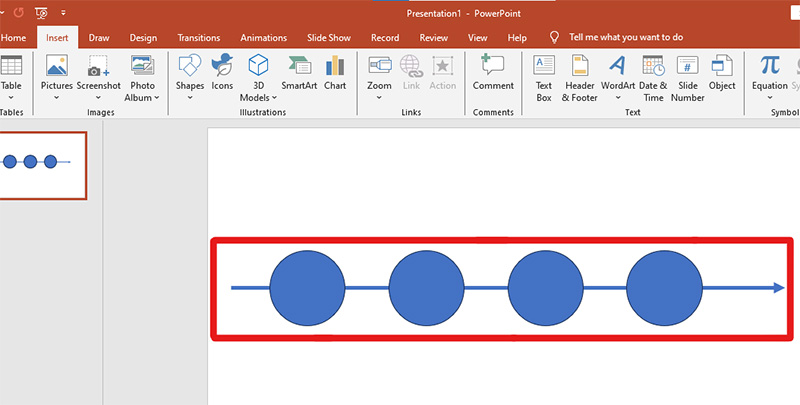
- Still in Insert > Shapes, pick a shape like a circle, square, or diamond.
- Place these shapes along the line to mark each key event or milestone.
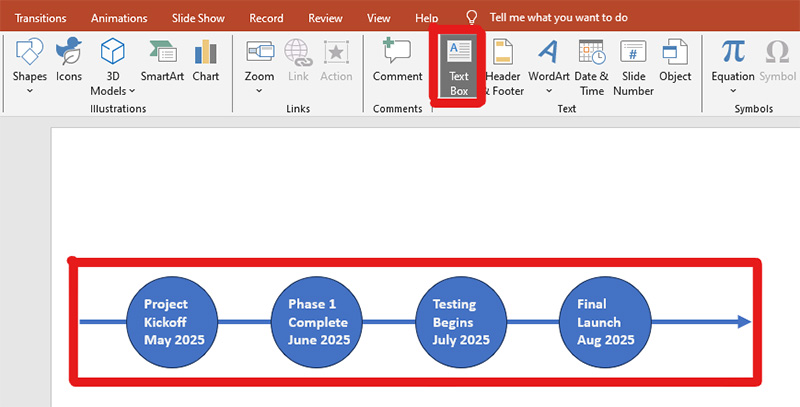
Label each event
- Use Insert > Text Box to type out short labels for each milestone, including dates and brief descriptions.
- Place each label near its corresponding shape to keep things clear.
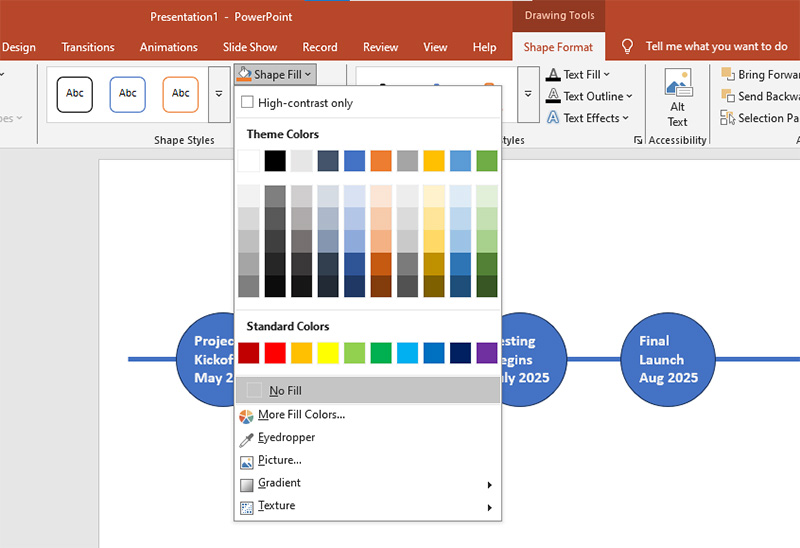
Customize the look
- Select your line, shapes, and text boxes, then use the Format tab to change colors, apply shadows, or tweak fonts.
- Keep your design consistent to maintain a clean and professional appearance.
This manual method takes a little more time but gives you full creative freedom to design a timeline that fits your content perfectly.
Pro Tips to Make Your Timeline Look Professional
A timeline that looks clean and well-designed leaves a stronger impact. Here are some simple but powerful tips to level up your PowerPoint timeline:
- Keep shapes, fonts, and colors consistent across all timeline elements
- Use short, clear text to avoid overwhelming your slide with too much detail
- Add icons to visually represent milestones and make your timeline easier to scan
- Use smooth animations to reveal one event at a time and hold the audience’s focus
- Leave enough white space between events so your design feels open and easy to read
- Stick to a limited color palette to keep things visually balanced and professional
- For important presentations, consider hiring a PowerPoint presentation design professional for a more polished look
Wrap Up!
Creating a timeline in PowerPoint is a straightforward process that can significantly enhance your presentations. Whether you use SmartArt for a quick solution or design one manually for more customization, timelines help convey information clearly and engagingly.
Remember, the key to a successful timeline is clarity, consistency, and relevance. By following the steps outlined in this guide, you can create timelines that not only inform but also captivate your audience.
If you’re looking to enhance your presentations further, collaborating with a PowerPoint presentation design professional can provide that extra polish and ensure your message leaves a lasting impression.
Author
Mr. Aijaz Mughal is a trusted advisor and thought leader in digital marketing and business growth with over 20 years of extensive experience. Throughout his illustrious career, he has had the privilege of working with top-tier brands such as Emaar, Masdar, Honda, Leejam, Unilever, The Dubai Mall, Emerson, Moorfields, and Yamaha, where he has made significant contributions to their digital marketing success.
Speak to an Expert